Welcome to Quarantine Design Tips with David Reid, President of Radiant Homes and Brandi Youngmark of Brandi Youngmark Interior Design!
We knew that there were a lot of people working on DIY projects during quarantine and we are passionate about distinguished design AND functionality so we wanted to offer to help.
We partnered up and put the offer out on social media to email us your design questions and boy, we got a lot a lot of emails! We are sharing some of the questions and our answers here. We hope you walk (or scroll) away inspired and ready to tackle your own DIY project.
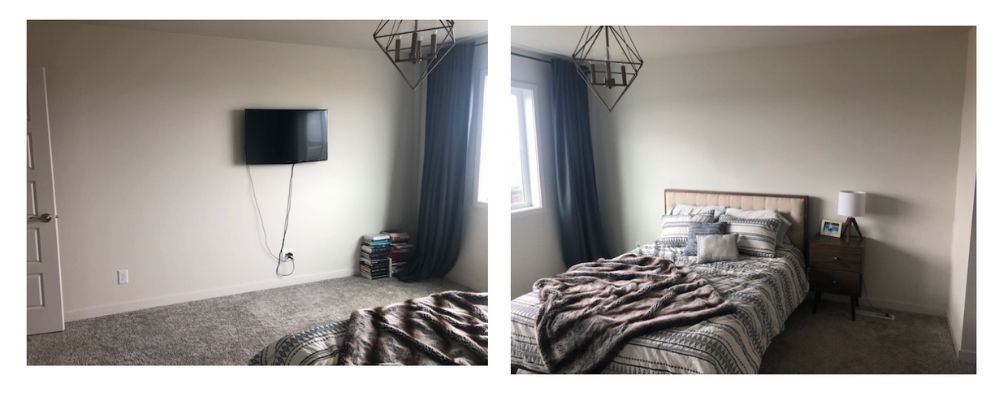
Question #1: Hi Brandi and Dave! Saw your post and would LOVE both of your input on my master bedroom! You guys have done such beautiful bedrooms, and mine has been totally ignored since moving in. Mom’s always last on the list, right??? I need something great on the wall behind my bed: feature wall, art, lighting…no idea. Plus, something on the wall where I have a TV. My style is very simple and clean. Modern Scandinavian??? Is that a thing? You guys are great; have loved following your work! -Cindy
Cindy’s Before:
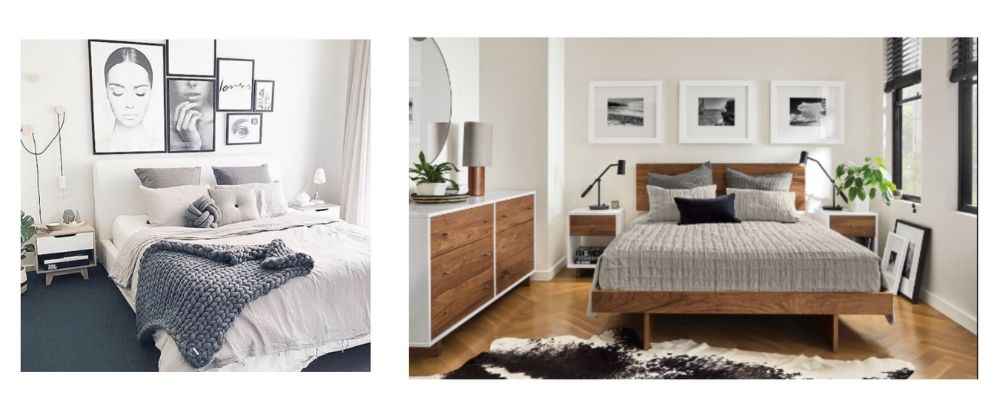
Brandi’s Answer: Modern Scandinavian is a thing! It’s a simple design with neutral colors, often times featuring natural materials and elements of nature. I would keep the existing paint color throughout the room. Consider adding a unique collage of art work above your headboard and matching night stands on each side with simple, contemporary white lamps and a touch of greenery. I would also lighten up the bedding with natural fabrics; add a contrasting throw blanket and pillows for texture. Regarding the TV wall, keep it simple yet purposeful. Let’s face it; as Moms, we could always use another space to finish getting ready! Consider a modern two-toned dresser with a mirror, and add some styling to it. I have included some inspiration photos for you!
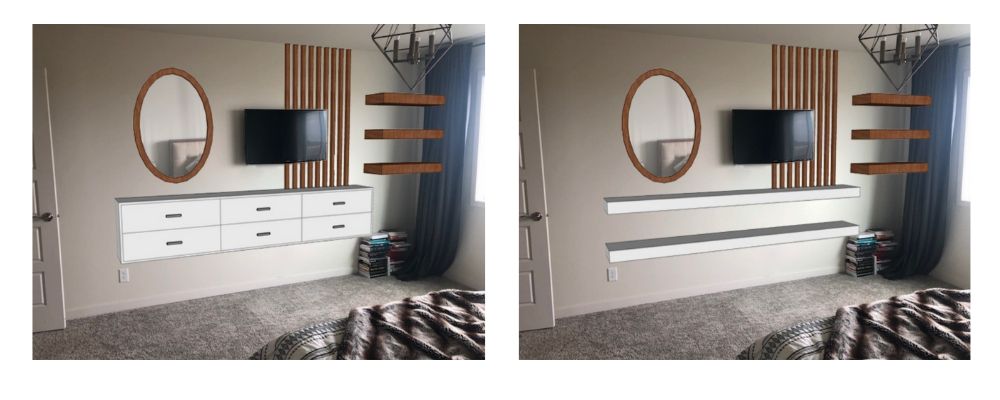
David’s Answer: I noticed a stack of books on the floor by the TV, which led me to another thought for the TV wall. If you’re like me, you like to have quick access to a “mini-library” for night-time reading (or for a reminder of those books you have been meaning to read ☺). I have attached a quick rendering including some floating shelves that would allow for book storage, additional photos, or some local TV equipment if it’s needed. Alternatively, the shelves below the TV could become floating drawers for wardrobe storage (like Brandi’s idea). I added some 2×2 boards installed vertically behind the TV for some accent. Also, a quick hack to hide the cords for the TV: use a cable access wall plate. Cut a hole behind the TV, and another next to the outlet (inside the same stud cavity). Fish the cables down from the top, and install the wall plate to cover the hole nicely.

Also, a quick hack to hide the cords for the TV: use a cable access wall plate. Cut a hole behind the TV, and another next to the outlet (inside the same stud cavity). Fish the cables down from the top, and install the wall plate to cover the hole nicely.
Question #2: I am looking for your help with design tips for a book shelf in my home office. I love to collect old/antique stuff, and my goal is to put some of those items in there. One of the few things I want to put there is an old mechanical adding machine (which is bit heavy), some old books including an old encyclopedia, and still looking for an old camera. Also, I found a piece of artwork which I think can go in the middle or have shelves around it on both sides. Maybe some cabinet space for some files. Walls are light gray and ceiling is white but it’s hard to see the difference. Please disregard my assistant; he thinks he owns the table. – Thusith
Thusith’s Before:
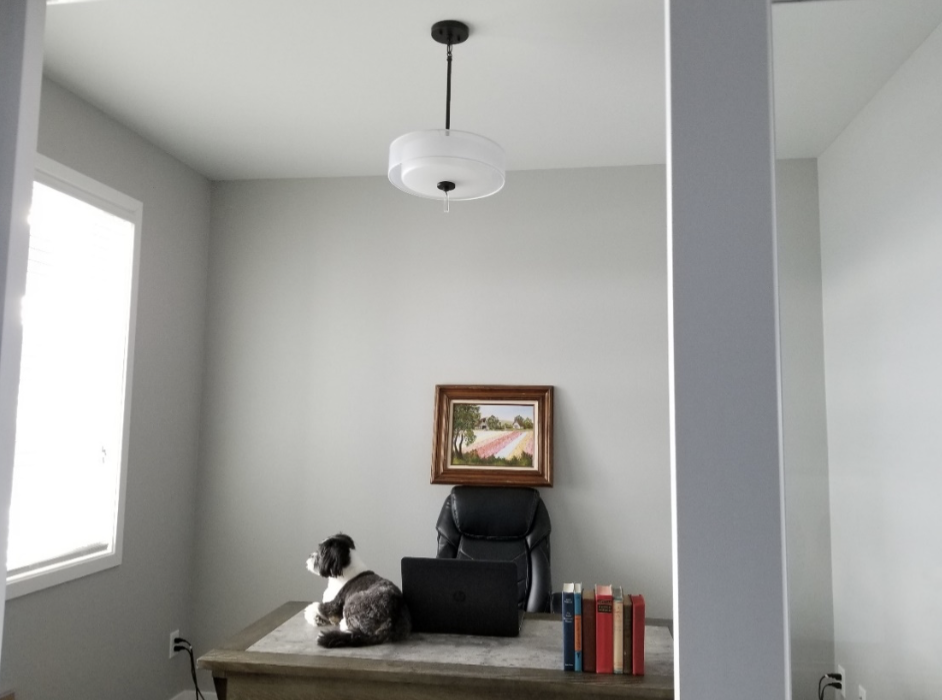
Brandi’s Answer: I am learning so much about old adding machines…how fun! I am finding that they can vary in size and weight; so we want to ensure you can properly support this…looking to David on that one:). I would consider adding a tall cabinet with file storage below to one side to store the adding machine, books and files. The remainder of the space add desk height counter and floating shelves above to display art and more collectables!
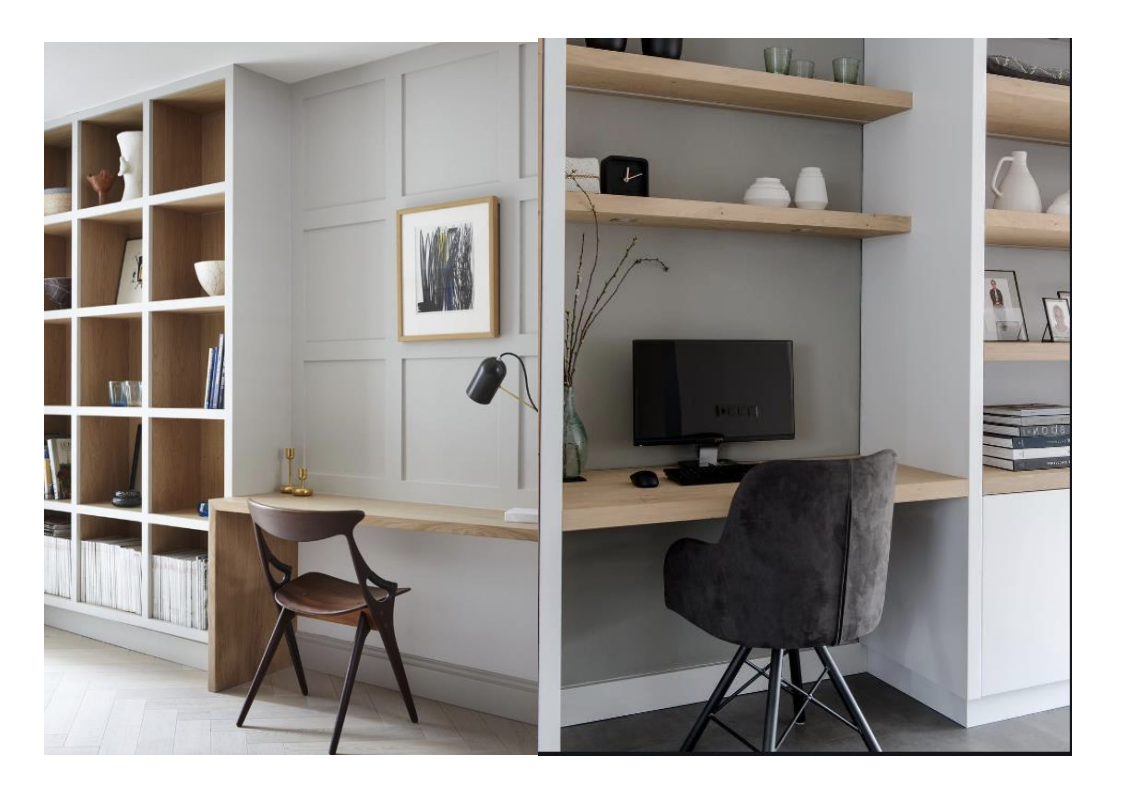
David’s Answer: I love the look of the inspiration photos that Brandi attached. I have sketched up a potential layout for your room that applies these concepts. You could have a tall white cabinet on one side with open shelving above and closed storage (doors or drawers) below. There are two long shelves spanning from this cabinet to the opposite wall. If you could match the tone of the gray oak on your desk for these, that would be sharp! You might even consider painting the wall behind the shelves a shade darker gray than the other walls for an accent. I would recommend 12-14 inch depth on these shelves if that would accommodate the items you would like to display.
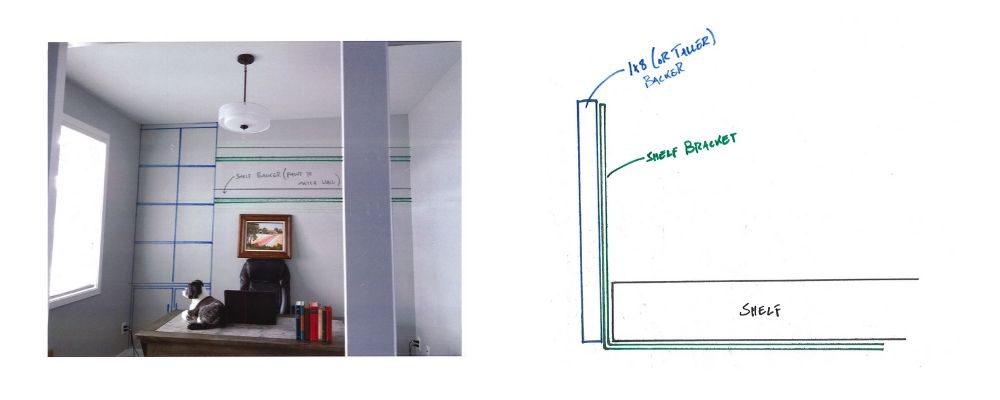
Since these shelves are long, and you may be displaying some heavier items, we need to have some good support! I would recommend using a 1×8 (or taller as needed), glued and screwed to studs, behind the shelf (continuous horizontally). Try searching the web for a modern shelf bracket, and install to the 1x. Try to hit studs with the shelf bracket, but if spacing doesn’t allow, the board will allow you to mount the bracket anywhere and will help carry the load.
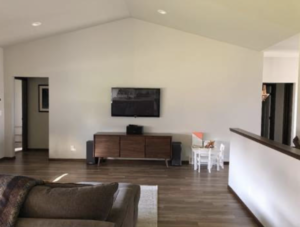
Question #3: I’d like to paint our large wall in the living room over maternity leave. I’m thinking some tone of blue. Do you have any blue colors that you love or have been using lately? – Allie
Allie’s Before:
David’s Answer: I’ll leave the color recommendations to Brandi, but here’s what I like to recommend when painting: Priming a wall before re-painting it is a best practice, especially if the existing color is very bold or bright. Use a gray tinted primer for best results; the darker and/or brighter your new color will be, the darker your gray tint should be. I like to “cut-in” corners and around trim with a brush first, then roll the wall as close to my cut-ins as possible in order to cover brush marks.
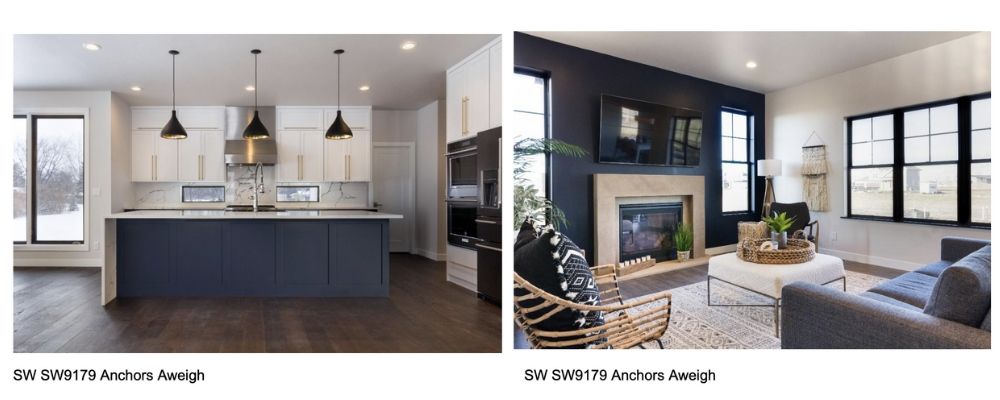
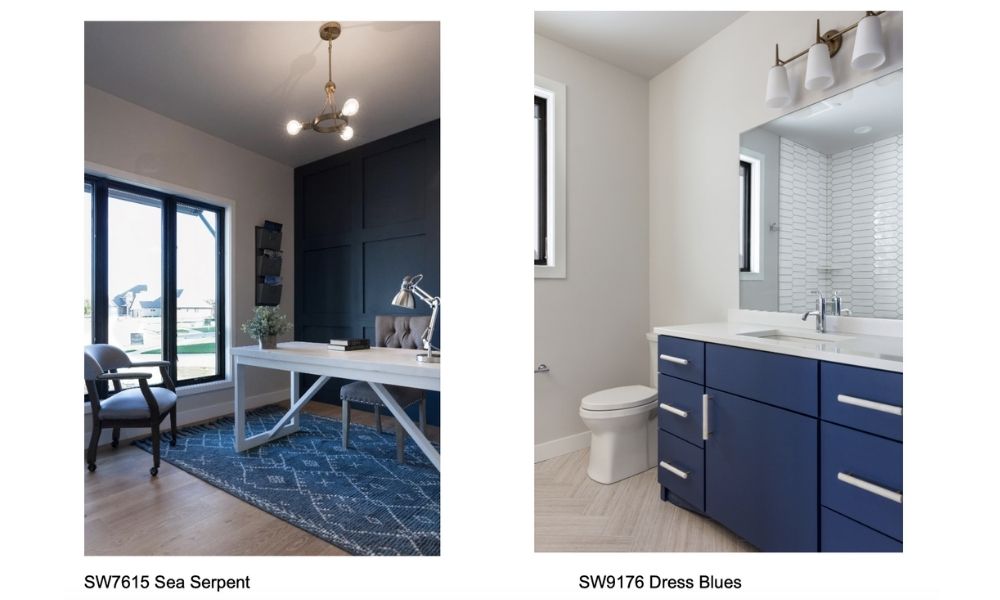
Brandi’s Answer: Navy is inspired by nature, from the night sky to the depths of the sea, and we will see it pop up in homes more this year as people step outside of their comfort zone to engage with contemporary design! My favorite blues are Sherwin Williams Anchors Aweigh, SW Sea Serpent, and SW Dress Blues, although Sherwin Williams’ color of the year is “Naval”, which I am excited to use on an upcoming project! See below images from projects I have completed with Radiant Homes utilizing these colors.
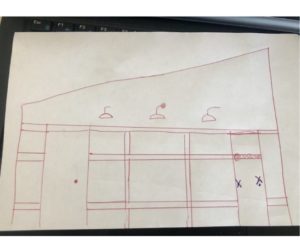
Question #4: We are adding a wall paneling detail to a hallway area; see attached sketch. The ceiling is vaulted with wood beams. Would you go all the way up to the ceiling with the wall paneling, or only bring it up to the height of the door frame?
Brandi’s Answer: I would stop the wall paneling at the door frame. I would recommend 4” wide boards for the paneling. You could install a wider trim piece across the top on which you could place the wall sconces! This would, however, require lowering the wall sconces from the height shown on your sketch.
David’s Answer: I would go all the way to ceiling; go big or go home! “Frame” the wall with trim on all 4 sides first. Try to line up your door head casing with a horizontal line of trim as you have shown; that’s a great detail. Don’t forget about the side casing for your door; this can simply butt into the bottom of the head casing. If you are going to paint the paneling, consider using MDF material; it paints up nicely and is much less expensive than solid wood. For installation, plan on gluing all members to the wall since you likely won’t be able to hit studs everywhere (you can use construction adhesive). However, beware; this is NOT going to come off nicely in the future!
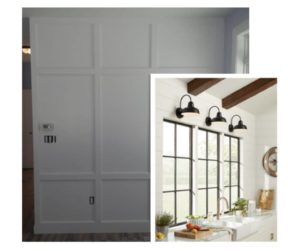
Question #4 Part 2: I am trying to decide between the two attached light fixtures for the locations shown on the sketch. Which one would you recommend?
Brandi: I would recommend the taller more arched light to give more height with the taller vaulted ceiling.
David: OK; she’s probably right on this one. I would go with the gooseneck light, too; seems like it would scale better with the taller ceiling height.
About our Contributors:
 Brandi Youngmark has an extensive background in residential design and planning. Her goal for each project is to be a guide and a resource for her clients through each phase of the construction process. Even before the first sketch is drawn, she works alongside the build team and client to establish a clear vision for the project.
Throughout construction, she guides the client through interior design, finish selections, and construction details, ensuring the design intent and vision have been captured. Brandi currently live in Fargo with her husband Justin and their 3 children, Maya, Corban and Carson.
She loves Minnesota summers, mountain biking, wake surfing and yoga!

David Reid is the President of Radiant Homes. He believes in working tirelessly to ensure that you see your home lift off the paper and become a home designed specifically for the life you are building. He also wants it to be a gratifying and enjoyable experience.
“When we hand over the keys, you will have a Radiant home or lake retreat that is unique to you and your family, and built within your budget.”
Each project is a piece of art and David wants it to be the homeowner’s masterpiece.
